Labels

hpunix (63) marathi kavita (52) linux (21) solaris11 (11) AWS (5) numerology (5)
Showing posts with label solaris 11. Show all posts

Monday, July 13, 2026

Dynamically Expanding CPU Resources for a Production Zone


Oracle Solaris Resource Pools: Dynamically Expanding CPU Resources for a Production Zone

One of the powerful capabilities of Oracle Solaris is the ability to allocate dedicated CPU resources to critical workloads using Resource Pools and Processor Sets. Recently, I had to increase the CPU allocation for a clustered production zone without causing any downtime.

This article walks through the process of reviewing the existing configuration, backing up the resource pool configuration, modifying the processor set, and activating the changes online.


Environment Overview

The server hosts multiple Solaris zones:

root@solaris-node01# zoneadm list -cv

ID NAME STATUS PATH BRAND IP
0 global running / solaris shared
1 appzone01 running /zones/appzone01 solaris10 excl
2 prodcluster01 running /zones/prodcluster01 solaris excl
3 clonezone01 running /zones/clonezone01 solaris excl
4 clonezone02 running /zones/clonezone02 solaris excl


Reviewing the Production Zone Configuration

The target zone was prodcluster01.

root@solaris-node01# zonecfg -z prodcluster01 info

zonename: prodcluster01
zonepath: /zones/prodcluster01
brand: solaris
autoboot: true
pool: prodpool
scheduling-class: FSS

[max-shm-memory: 64G]
[max-shm-ids: 4096]
[max-sem-ids: 4096]

net:
physical: vnic0
net:
physical: vnic1

attr:
name: cluster
type: boolean
value: true
``

Notable configuration items:

  • Dedicated Resource Pool
  • Fair Share Scheduler (FSS)
  • Cluster-enabled zone
  • 64 GB shared memory allocation
  • Multiple network interfaces for cluster traffic

Reviewing Current Pool Allocations

Before making any resource changes, check the current pool distribution.

root@solaris-node01# poolstat

pset
id pool size used load
1 prodpool 32 0.00 2.93
0 pool_default 80 0.00 1.38
2 dbpool 16 0.00 0.56

Current CPU allocation:

PoolCPUs
prodpool32
dbpool16
pool_default80

The production zone currently owns a dedicated processor set containing 32 CPUs.


Verify Processor Set Configuration

Check the current processor set definition.

poolcfg -c 'info pset prodpset'

Output:

pset prodpset

uint pset.min 32
uint pset.max 32

This indicates that the processor set is statically configured with 32 CPUs.


Backup the Existing Configuration

Before making changes, always save the current configuration.

pooladm -s /var/tmp/poolcfg-backup-$(date +%Y%m%d)

Verification:

ls -lrt /var/tmp/poolcfg-backup-20260427

-rw-r--r-- 1 root root 19.7K Apr 27 14:18
/var/tmp/poolcfg-backup-20260427

Having a backup provides a quick rollback option if necessary.


Increasing CPU Allocation

The requirement was to increase CPU resources allocated to the production cluster zone.

Current allocation:

32 CPUs

Target allocation:

48 CPUs

Modify the processor set:

poolcfg -c 'modify pset prodpset (uint pset.min=48; uint pset.max=48)'

At this point, the change is stored in the configuration repository but has not yet been activated.


Verify Before Activating

Checking immediately after the modification:

poolstat

pset
id pool size used load
1 prodpool 32 0.00 3.92
0 pool_default 80 0.00 1.26
2 dbpool 16 0.00 0.58

The active configuration still shows 32 CPUs because the updated configuration has not yet been committed.


Activate the New Configuration

Apply the modified resource pool configuration.

pooladm -c

This operation dynamically reallocates CPUs without requiring a system reboot.


Verify the Results

Check the allocations again:

poolstat

pset
id pool size used load
1 prodpool 48 0.00 4.42
0 pool_default 64 0.00 1.58
2 dbpool 16 0.00 0.56

Success.

The production processor set increased from:

32 CPUs → 48 CPUs

and the CPUs were automatically taken from the default pool:

pool_default: 80 CPUs → 64 CPUs

All changes were made online with no interruption to the running zone.


Lessons Learned

Always Backup First

Before modifying any resource pool configuration:

pooladm -s <backup_file>

Having a rollback option is a best practice in production environments.

Changes Are Not Active Until Committed

Modifying the processor set changes only the configuration database.

poolcfg ...

To activate the change:

pooladm -c

Online Resource Reallocation

Oracle Solaris allows CPUs to be reassigned between processor sets dynamically, enabling administrators to respond quickly to changing workload demands without requiring downtime.

Resource Pools Simplify Capacity Management

Dedicated pools provide predictable performance and workload isolation for critical applications.


Command Summary

# Review zone configuration
zonecfg -z prodcluster01 info

# Review active pool allocations
poolstat

# Review processor set configuration
poolcfg -c 'info pset prodpset'

# Backup current configuration
pooladm -s /var/tmp/poolcfg-backup-$(date +%Y%m%d)

# Increase allocated CPUs
poolcfg -c 'modify pset prodpset (uint pset.min=48; uint pset.max=48)'

# Apply configuration
pooladm -c

# Verify results
poolstat

Conclusion

Oracle Solaris Resource Pools provide a powerful framework for workload isolation and capacity management. In this example, a production cluster zone's dedicated CPU allocation was increased from 32 CPUs to 48 CPUs using online pool reconfiguration, demonstrating how Solaris can dynamically adapt system resources to meet evolving business demands without impacting application availability.

Monday, July 7, 2025

Solaris 11.4 Installation steps from beginning

Solaris 11.4 Installation steps from beginning 


This document will help you in installing Solaris 11.4 on SPARC Hardware

1.       Here we are installing Solaris 11.4 from the ISO file. So, search in google or download it from MOS (My Oracle Support) and attach it to ILOM.

https://www.oracle.com/solaris/solaris11/downloads/solaris11-install-downloads.html

Link: https://support.oracle.com/portal/


2.       Below is the method to do the same.

Login to ILOM GUI session. Go to Remote Controlà Redirectionà Launch Remote console.

(You may need to download java package in case you get some java related error)


3.       You will see console screen like this.


4.       Go to KVMSàStorageà Add iso file à connect.


5.       Add and connect ISO file here from the path where you have stored. So it will be visible on server as boot device.


Now Take CLI session of you ILOM.

6.       And stop your system and wait for some time;


7.       you can see the power state off and then start the system. And to see what is happening in the background take /SP/console


8.       Below command will search boot devices. Here we want to boot from the ISO image and the “rcdrom” is showing alias for this. We will boot from rcdrom.


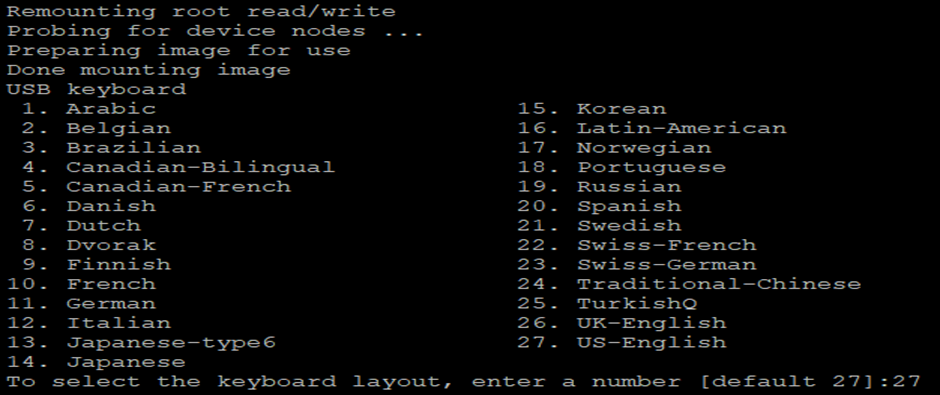
9.       After booting, it will ask to choose keyboard and language.


10.   Since we want to install oracle solaris freshly; we will select option 1


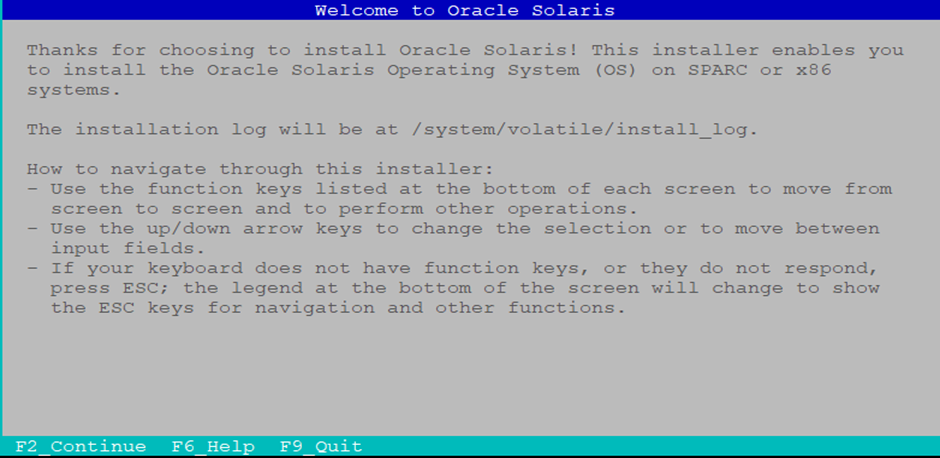
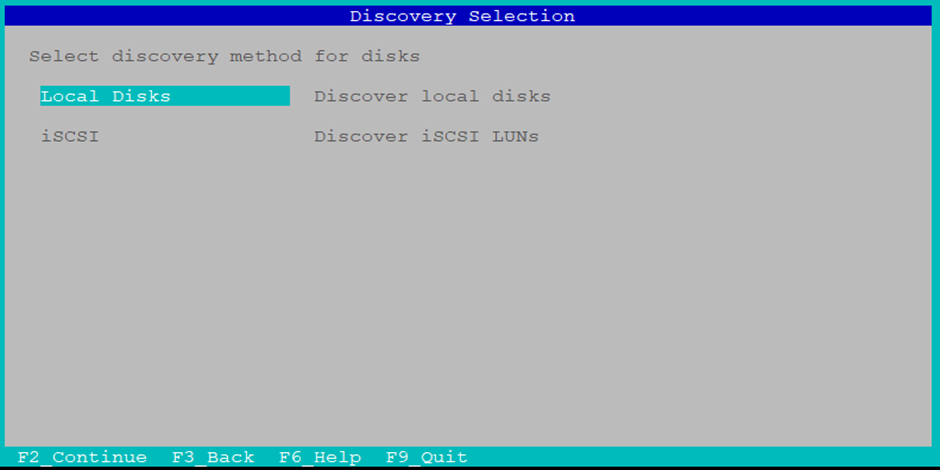
11.   Actual Solaris installation will start from here. Press F2 to continue and move to next field.


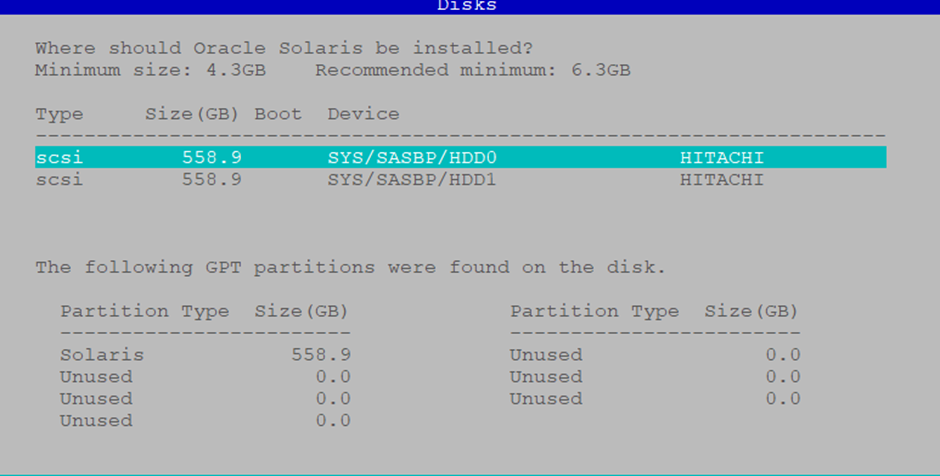
12.Select your disk where you want to install your Solaris OS.


13.   We can mention required Server hostname here.


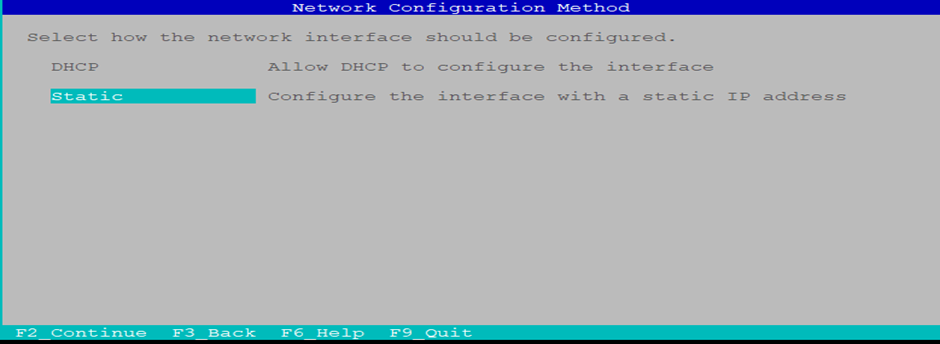
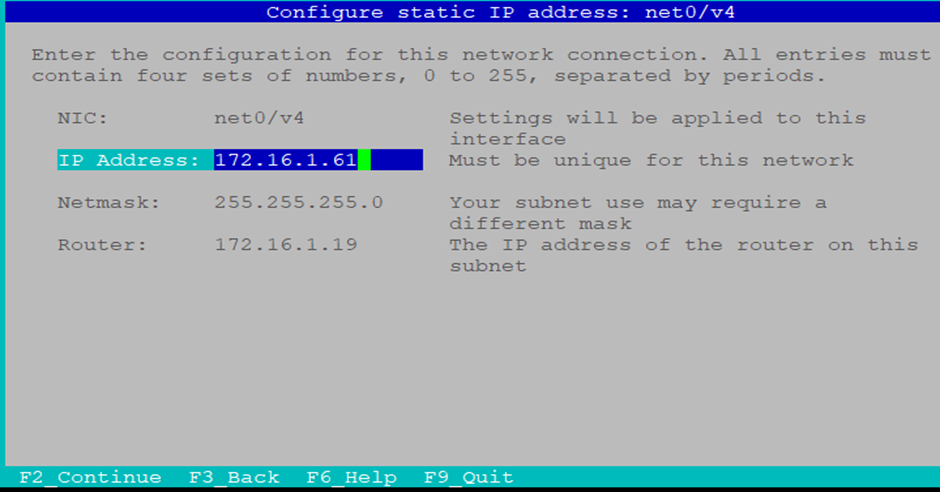
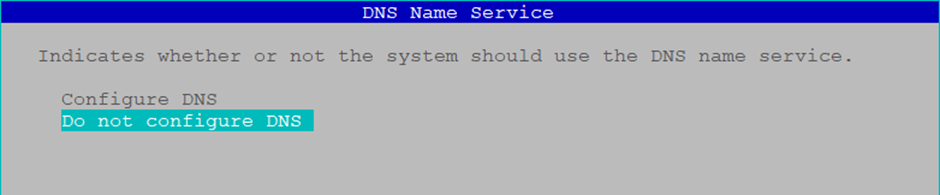
14.   Please mention your network configuration here.


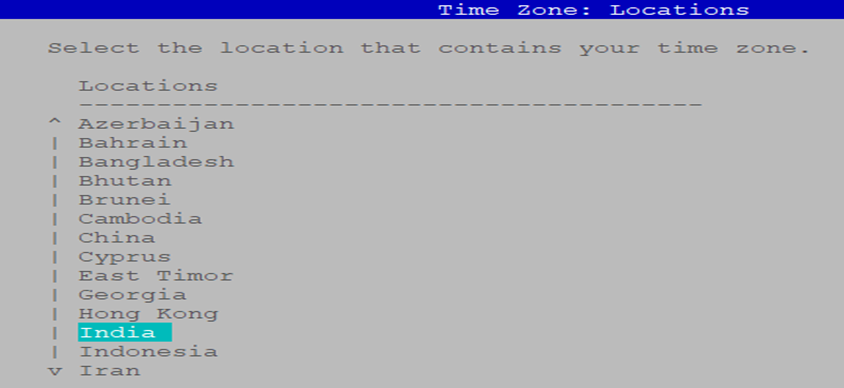
15.   Please set correct date and time here.


16.   We can set root password here.


17.   This will give installation summary to you. If any rectification needed, then please rectify.


18.   This will start installation and will show you progress (It will take approx. 1hr).


19.   Once installation completes properly, you will see below screen. Press F8 for system reboot.


20.   You will get login prompt that means installation is competed. Once the server is up; we can verify whether Solaris 11.4 OS is installed on the server or not using below commands.


Regards,
Kiran Jadhav

Tuesday, November 12, 2024

How to assign ILOM IP to the new Solaris server + Solaris 11

How to Assign ILOM IP to a New Solaris Server (Solaris 11)

Setting up a new Solaris server involves several steps, and one of the most critical is configuring the Integrated Lights Out Manager (ILOM) IP address. This allows administrators to manage the server remotely, even when the operating system is not running. In this blog, I’ll walk you through the process of assigning an ILOM IP to a newly racked Solaris 11 server.


🧰 Prerequisites

Before you begin, ensure the following:

  • The server is rack-mounted and connected to power and network.
  • You have the server make and model noted down.
  • console cable is available to connect your laptop to the server.
  • You’ve received the ILOM IP address, gateway, and netmask from your network team.

🖥️ Step-by-Step Guide

1. Connect to ILOM via Serial Console

  • Use a console cable to connect your laptop to the server’s NET MGMT port.
  • On your laptop, open Computer Management:
    • Navigate to: Computer Management > Device Manager > Ports (COM & LPT)
    • Note the COM port number assigned to the console cable.

2. Launch Serial Session Using PuTTY

  • Open PuTTY and select the Serial connection type.
  • Enter the COM port noted earlier.
  • Set the baud rate (typically 9600, but may vary based on server model).
  • Click Open to initiate the session.

📌 Tip: Baud rate may differ depending on hardware. Refer to the server documentation or search based on the make and model.

3. Log in to ILOM

  • Press Enter in the PuTTY window to bring up the ILOM login prompt.
  • Log in using the default or configured credentials.

🌐 4. Configure ILOM Network Settings

Once logged in, follow these commands to assign a static IP:

cd /SP/network 

set pendingipdiscovery=static 
set pendingipaddress=(IP address)
set pendingipnetmask=(Netmask)
set pendingipgateway=(Gateway)
set commitpending=true 
set state=enable

 Verify Configuration

Run the following to confirm the IP settings:

#show /SP/network
You should now see the assigned IP address and other network details.

🌍 5. Access ILOM via Web Interface

With the IP configured, you can now access the server’s ILOM interface through a browser:

https://<ILOM_IP>

Log in and begin managing the server remotely.


📝 Conclusion

Assigning an ILOM IP is a foundational step in setting up a new Solaris server. It ensures that you have out-of-band management access, which is crucial for troubleshooting and maintenance. By following the steps above, you can quickly and securely configure ILOM and begin your server setup with confidence.


Author:
Kiran Jadhav
Principal Consultant | Solaris Admin
Mumbai, Maharashtra

Tuesday, July 30, 2024

How to create bootable USB in solaris

How to Create a Bootable USB (Pen Drive) in Solaris

Creating a bootable USB in Solaris is a crucial task for system administrators, especially when dealing with server recovery, new installations, or maintenance scenarios. Whether you're recovering a root password or booting a server from ISO media, having a bootable USB ready can save valuable time.


Why Is It Required?

There are several scenarios where booting from a USB ISO image becomes necessary:

  • Root password recovery
  • Fresh OS installation
  • Server in maintenance mode
  • Booting from ISO for troubleshooting

Step-by-Step Guide

Step 1: Download the Solaris ISO

Search on Google:
Solaris 11.4 ISO download

Choose the correct ISO based on your server architecture:

  • SPARC → Download SPARC USB Text Installer
  • X86 → Download X86 USB Text Installer

For SPARC hardware, download:

SPARC Text Installer ISO

Step 2: Transfer ISO to a Test Solaris Server

Once downloaded, copy the ISO to a working Solaris server.


root@cdom3:~# ls -lrth
-rw-r--r--   1 root     root        1.1G Jul 18 13:09 sol-11_4-text-sparc.usb
root@cdom3:~#

Step 3: Write ISO to USB Drive

Insert the USB drive into the test server and run:

root@cdom3:~# usbcopy sol-11_4-text-sparc.usb

You’ll see output like:

image type: dd-able Sparc
Found the following USB devices:
0:      /dev/rdsk/c9t0d0s2      14.7 GB SanDisk  Cruzer Blade     1.00
Enter the number of your choice: 0

WARNING: All data on your USB storage will be lost.

Are you sure you want to install to
SanDisk Cruzer Blade 1.00, 14700 MB at /dev/rdsk/c9t0d0s2 ?  (y/n) y
Copying and verifying image to USB device
Finished 1160 MB in 234 seconds (4.9MB/s)
Successfully completed copy to USB


Step 4: Remove USB and Insert into Target Server

Once the image is successfully copied, remove the USB from the test server and insert it into the target server (in maintenance mode).


Step 5: Boot Server from USB

At the OK prompt, scan for connected devices

{0} ok probe-scsi-all       

Target 9
  Unit 0   Disk   HITACHI  H109030SESUN300G A606    585937500 Blocks, 300 GB
  SASDeviceName 5000cca043487328  SASAddress 5000cca043487329  PhyNum 0
Target a
  Unit 0   Disk   HITACHI  H109030SESUN300G A606    585937500 Blocks, 300 GB
  SASDeviceName 5000cca043487400  SASAddress 5000cca043487401  PhyNum 1

/pci@340/pci@1/pci@0/pci@3/usb@0/hub@8/storage@1
  Unit 0   Removable Disk     SanDiskCruzer Blade1.00

Identify the USB device:

{0} ok devalias
Select the USB disk (e.g., option h) and create a device alias:
{0} ok show-disks
a) /reboot-memory@0
b) /pci@380/pci@1/pci@0/pci@7/SUNW,qlc@0,1/fp@0,0/disk
c) /pci@380/pci@1/pci@0/pci@7/SUNW,qlc@0/fp@0,0/disk
d) /pci@380/pci@1/pci@0/pci@6/SUNW,qlc@0,1/fp@0,0/disk
e) /pci@380/pci@1/pci@0/pci@6/SUNW,qlc@0/fp@0,0/disk
f) /pci@3c0/pci@1/pci@0/pci@2/scsi@0/disk
g) /pci@300/pci@1/pci@0/pci@2/scsi@0/disk
h) /pci@340/pci@1/pci@0/pci@3/usb@0/hub@8/storage@1/disk
i) /iscsi-hba/disk
q) NO SELECTION
Enter Selection, q to quit: h
/pci@340/pci@1/pci@0/pci@3/usb@0/hub@8/storage@1/disk has been selected.
Type ^Y ( Control-Y ) to insert it in the command line.
e.g. ok nvalias mydev ^Y
         for creating devalias mydev for /pci@340/pci@1/pci@0/pci@3/usb@0/hub@8/storage@1/disk
Boot from the USB:
{0} ok boot mydev
Boot device: /pci@300/pci@1/pci@0/pci@2/scsi@0/disk@p0  File and args: mydev
/
If that fails, boot directly using the full device path:
{0} ok boot /pci@340/pci@1/pci@0/pci@3/usb@0/hub@8/storage@1/disk

Conclusion

Creating a bootable USB in Solaris is straightforward but powerful. It enables administrators to recover, reinstall, or troubleshoot servers efficiently. Always ensure you select the correct ISO and verify the USB copy process before proceeding.


Regards,

Kiren Jadhav