Labels

hpunix (63) marathi kavita (52) linux (21) solaris11 (11) AWS (5) numerology (5)

Friday, July 18, 2025

How to Add Disks in an Oracle Database Appliance (ODA) Single Node BM


How to Add Disks in an Oracle Database

Appliance (ODA) Single Node BM

When managing an Oracle Database Appliance (ODA), ensuring sufficient disk space in the DATA and RECO diskgroups is crucial for optimal performance and storage management. If you find yourself running low on space and need to add new physical NVMe disks, follow these step-by-step instructions to expand your storage on a single-node Bare Metal ODA.

Prerequisites

  • Ensure you have 4 new NVMe disks ready for installation.
  • Confirm the ODA is a single-node Bare Metal system.
  • Have administrative access to run odaadmcli commands.

Step-by-Step Guide

1. Check Current Diskgroup Usage

Before adding new disks, assess the current size of the DATA and RECO diskgroups:

# odaadmcli show diskgroup

This command displays the current allocation and usage of the diskgroups.


2. Review Existing Disk Status

Identify the existing disk IDs and their status:

# odaadmcli show disk

Note down disk IDs like pd_00, pd_01, etc., for reference.


3. Insert New Physical Disks

Insert the new NVMe disks one at a time into available slots (e.g., slots 4 to 7). If a disk is not automatically powered on or visible, manually power it on:

# odaadmcli power disk on pd_04
# odaadmcli power disk on pd_05
# odaadmcli power disk on pd_06
# odaadmcli power disk on pd_07

Replace pd_04 to pd_07 with the actual disk IDs if they differ.


4. Expand Storage

Once all disks are inserted and powered on, expand the storage to include the new disks:

# odaadmcli expand storage -ndisk 4

This command adds the 4 new disks to the ODA storage pool.


5. Verify Disk Addition

Recheck the disk status to confirm the new disks are recognized:

# odaadmcli show disk

You should now see the newly added disks listed.


6. Confirm Diskgroup Expansion

Finally, verify that the DATA and RECO diskgroups have increased in size:

# odaadmcli show diskgroup

This confirms successful expansion of your storage.


Conclusion

Adding disks to an Oracle Database Appliance is a straightforward process when done methodically. Regular monitoring and timely expansion of storage ensure your database environment remains robust and efficient.


Wednesday, July 9, 2025

Basic important ODA (Oracle Database Appliance) commands:

Mastering Oracle Database Appliance (ODA): 15 Essential Commands Every Admin Should Know

As working ODA admin, one of the key responsibilities is ensuring the smooth operation of Oracle Database Appliances (ODA). Whether you're managing a Bare Metal (BM) or Virtualized ODA environment, having a solid grasp of the most frequently used commands can significantly enhance your efficiency and troubleshooting capabilities.

In this blog, I’ll walk you through 15 essential ODA commands that every administrator should keep in their toolkit.


🔍 System & Disk Insights

  1. odaadmcli show disk
    Displays the current status of all disks in the system.
    Useful for checking disk health and identifying potential issues.

  2. odaadmcli show server
    Provides server details including serial number and hardware specifications.
    Handy for inventory and support cases.

  3. odaadmcli show env_hw
    Reveals the ODA model and whether it's configured as Bare Metal or Virtualized.
    Crucial for understanding the deployment architecture.


🖥️ Virtual Machine (VM) Management

  1. odacli list-vms
    Lists all running VMs and their associated nodes.
    Helps track VM distribution across nodes.

  2. odacli stop-vm -n <VM_Name>
    Stops the specified VM gracefully.
    Ideal for maintenance or resource reallocation.

  3. odacli start-vm -n <VM_Name>
    Starts the specified VM.
    Quick recovery or scheduled startup.

  4. odacli start-vm -n odavm -nn node0
    Starts the VM odavm on a specific node (e.g., node0).
    Useful for node-specific operations or testing.

  5. virsh list or virsh list --all
    Lists all VMs, including inactive ones.
    A broader view of VM inventory.

  6. virsh domblklist <VM_Name>
    Displays all disk details attached to a VM.
    Essential for snapshot planning and storage audits.

  7. odacli describe-vm -n <VM_Name>
    Provides detailed information about a specific VM.
    Includes configuration, resource allocation, and status.

  8. virsh console <VM_ID>
    Accesses the console of a specific VM.
    Direct interaction for troubleshooting or configuration.


🗃️ Database System & Component Overview

  1. odacli list-dbsystems
    Lists all DB systems configured on the ODA.
    Helps monitor database deployments and usage.

  2. odacli describe-component
    Displays installed and available versions of components like DCS Controller, OS, ILOM, BIOS, etc.
    Vital for patching and version control.


📋 Job Monitoring & Troubleshooting

  1. odacli list-jobs
    Lists all jobs initiated via odacli commands.
    Tracks task execution and history.

  2. odacli describe-job -i <Job_ID>
    Provides detailed status (success/failure) of a specific job.
    Crucial for debugging and audit trails.


✅ Final Thoughts

These commands form the backbone of ODA administration. Whether you're provisioning VMs, monitoring disk health, or managing patch levels, having these commands at your fingertips can streamline operations and reduce downtime.

If you're new to ODA or looking to refine your command-line skills, start by practicing these commands in a test environment. Over time, they’ll become second nature and empower you to manage your Oracle infrastructure with confidence.


Author:
Kiran Jadhav
Mumbai, Maharashtra


Monday, July 7, 2025

Solaris 11.4 Installation steps from beginning

Solaris 11.4 Installation steps from beginning 


This document will help you in installing Solaris 11.4 on SPARC Hardware

1.       Here we are installing Solaris 11.4 from the ISO file. So, search in google or download it from MOS (My Oracle Support) and attach it to ILOM.

https://www.oracle.com/solaris/solaris11/downloads/solaris11-install-downloads.html

Link: https://support.oracle.com/portal/


2.       Below is the method to do the same.

Login to ILOM GUI session. Go to Remote Controlà Redirectionà Launch Remote console.

(You may need to download java package in case you get some java related error)


3.       You will see console screen like this.


4.       Go to KVMSàStorageà Add iso file à connect.


5.       Add and connect ISO file here from the path where you have stored. So it will be visible on server as boot device.


Now Take CLI session of you ILOM.

6.       And stop your system and wait for some time;


7.       you can see the power state off and then start the system. And to see what is happening in the background take /SP/console


8.       Below command will search boot devices. Here we want to boot from the ISO image and the “rcdrom” is showing alias for this. We will boot from rcdrom.


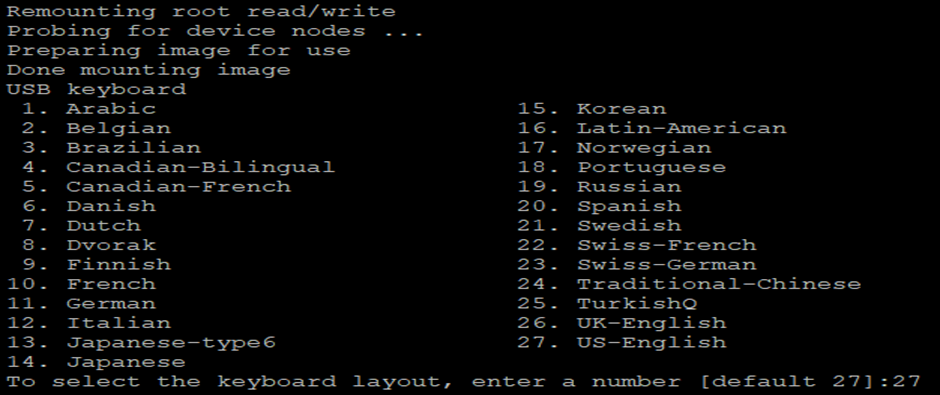
9.       After booting, it will ask to choose keyboard and language.


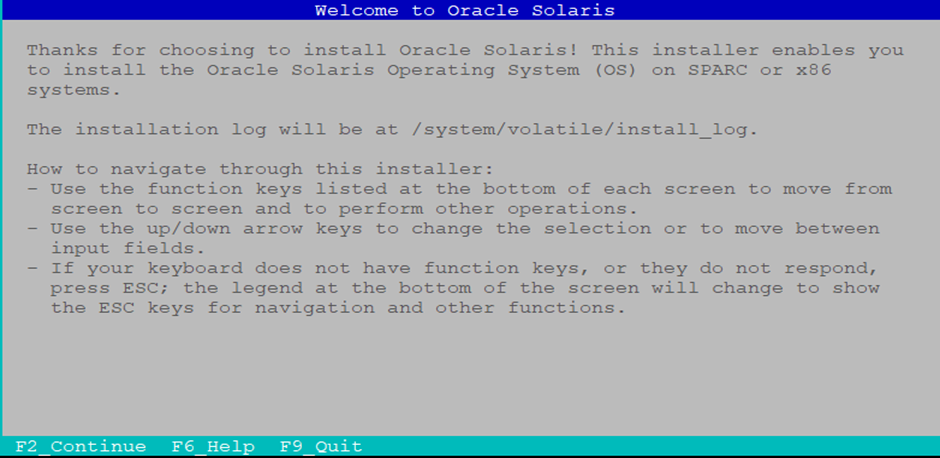
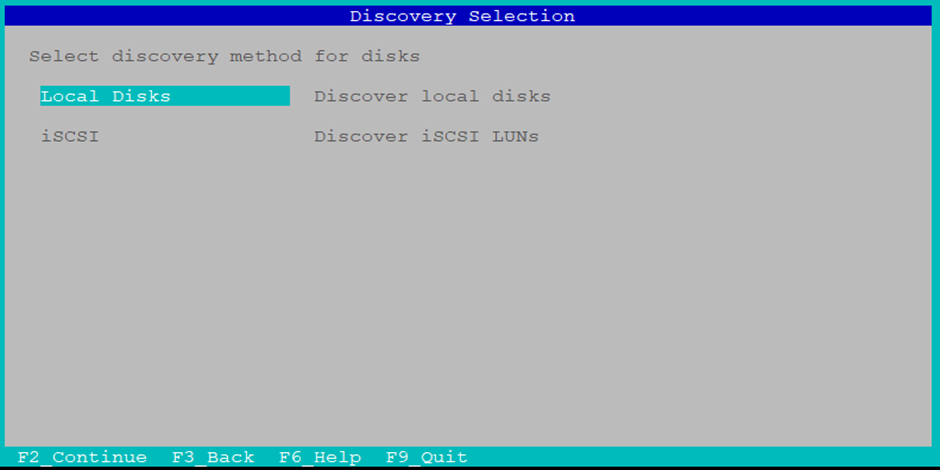
10.   Since we want to install oracle solaris freshly; we will select option 1


11.   Actual Solaris installation will start from here. Press F2 to continue and move to next field.


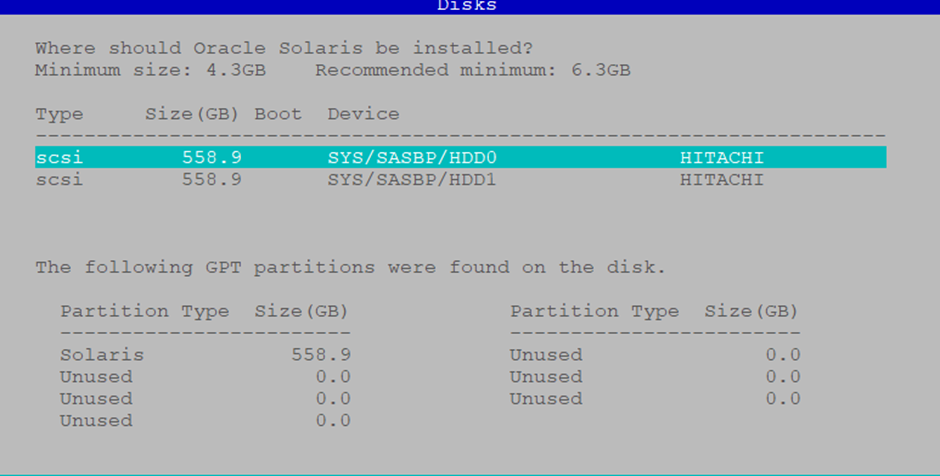
12.Select your disk where you want to install your Solaris OS.


13.   We can mention required Server hostname here.


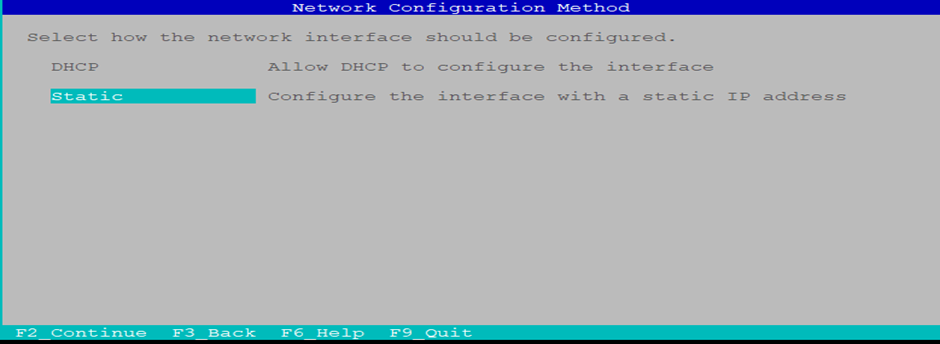
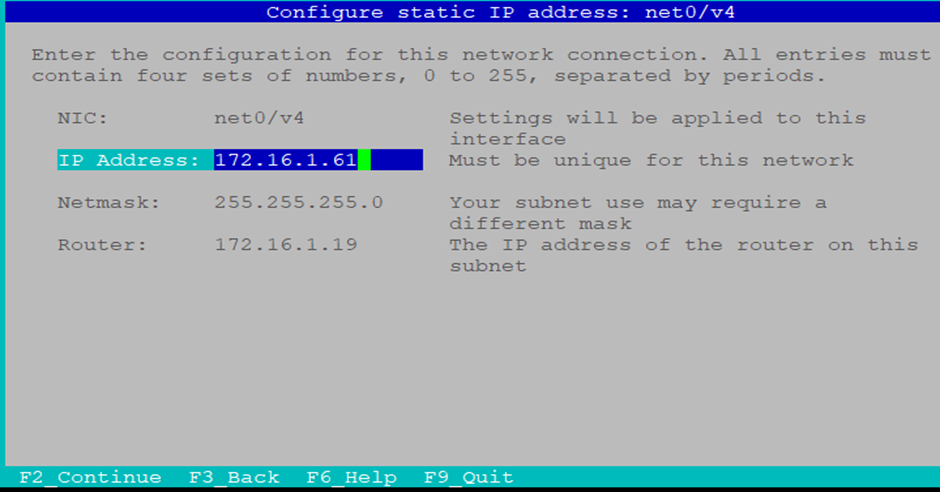
14.   Please mention your network configuration here.


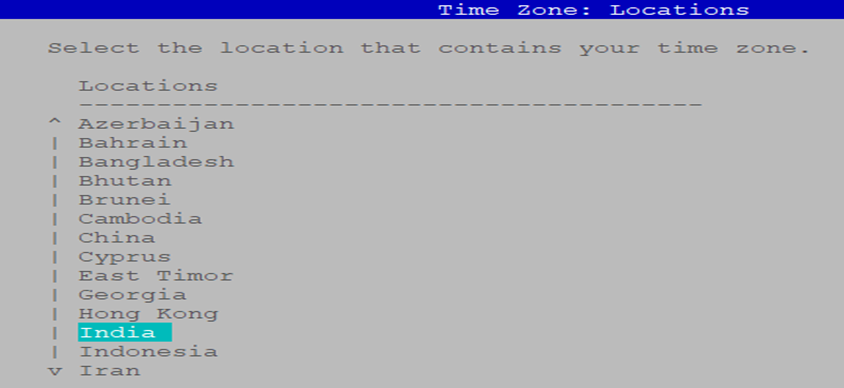
15.   Please set correct date and time here.


16.   We can set root password here.


17.   This will give installation summary to you. If any rectification needed, then please rectify.


18.   This will start installation and will show you progress (It will take approx. 1hr).


19.   Once installation completes properly, you will see below screen. Press F8 for system reboot.


20.   You will get login prompt that means installation is competed. Once the server is up; we can verify whether Solaris 11.4 OS is installed on the server or not using below commands.


Regards,
Kiran Jadhav